Tuesday, November 24, 2015

SharePoint 2010 - Tutorial - Hiding Ribbon Items

Today I want to show you, how you can hide items from the ribbon bar.
We start as usual with an empty SharePoint project.
Add a new item to the project: User Control and give it a name (i.e. "RibbonControl.ascx").


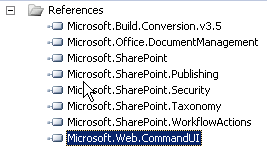
Add the "Microsoft.Web.CommandUI.dll" reference from "c:\program files\common files\microsoft shared\web server extensions\14\isapi"-folder to your project.


Then open the code-behind file. In my case it is "RibbonControl.ascx.cs".


Add the following namespaces to your code:

using Microsoft.SharePoint;
using Microsoft.SharePoint.WebControls;
using Microsoft.Web.CommandUI;

Use the ribbon.TrimById() method to hide items in the ribbon bar.
Here are some examples. See a full list of all ribbon items here:

https://msdn.microsoft.com/en-us/library/office/ee537543(v=office.14).aspx

protected void Page_Load(object sender, EventArgs e)
{
            try
            {
                SPRibbon ribbon = SPRibbon.GetCurrent(this.Page);
                using (SPSite site = SPContext.Current.Site)
                {
                    //"Documents"-tab
                    ribbon.TrimById("Ribbon.Documents.Copies");
                    ribbon.TrimById("Ribbon.Documents.Workflow");
                    ribbon.TrimById("Ribbon.Documents.Share");
                    ribbon.TrimById("Ribbon.Documents.Manage.ManagePermissions");
                    ribbon.TrimById("Ribbon.Documents.TagsAndNotes");

                    //"Library"-tab
                    ribbon.TrimById("Ribbon.Library.ViewFormat");
                    ribbon.TrimById("Ribbon.Library.Share");
                    ribbon.TrimById("Ribbon.Library.Datasheet");
                    ribbon.TrimById("Ribbon.Library.Actions");
                    ribbon.TrimById("Ribbon.Library.CustomizeLibrary");
                }
            }
            catch (Exception exp)
            {
                throw exp;
            }
}

Then your user control is ready now.
The next step is to add your user control whereever you need it, i.e. to your master page, page, web parts etc..
To deploy a custom master page, see my blog post http://me-and-my-sharepoint.blogspot.de/2015/11/sharepoint-2010-tutorial-deploying.html
You can also use SharePoint Designer to modify a page.

I deployed a custom master page to hide ribbon items in all document libraries in a site collection.
Register the user control at the top of the page:

<%@ Register TagPrefix="custom" TagName="RibbonBarControl" src="~/_controltemplates/TestRibbonsHideProject/RibbonControl.ascx" %>


We've created user control for SharePoint 2010, registered it on the page. Now, the final step is to  include the user control in the page itself:


<custom:RibbonControl id="RibbonControl1" runat="server"></custom:RibbonControl>


Then we are ready to deploy the solution.

See the ribbon bar before activating our user control:


Then afterwards:


Hope you enjoyed it. Feel free to leave a comment, if you like (or not) ;-)

Friday, November 20, 2015

SharePoint 2010 - Tutorial - Deploying a custom master page

Please feel free to comment my new tutorial "Deploying a custom master page" in a SharePoint 2010 enviroment. Enjoy.

The first step is to add feature to your project, if you have not already one. 
I created an empty SharePoint project for this tutorial.


Ensure, that the feature scope is set to "Site" to apply the master page to all webs in this site collection.


Then add a "Module" to the project. You can give any name:


After the module is created it contains an "elements.xml" and "sample.txt" file. The "sample.txt" file can be renamed to "sample.master".

Your project then should cotain these elements:


Best practice: Open the SharePoint Designer, navigate to the current master file and edit it.
Note: In SharePoint 2010 the default master page is "v4.master" and NOT "default.master"


Copy the contents of "v4.master" in your "sample.master" and do your changes on the code.

Then make sure, that your "elements.xml" of the module looks like this:


<?xml version="1.0" encoding="utf-8"?>
<Elements xmlns="http://schemas.microsoft.com/sharepoint/">
  <Module Name="Module1" List="116" Url="_catalogs/masterpage">
  <File Path="Module1\sample.master" Url="sample.master" Type="GhostableInLibrary" IgnoreIfAlreadyExists="FALSE" />
</Module>
</Elements>
You could stop here and this solution will deploy your "sample.master" master page to the master page gallery of your site collection. 
This will not apply the master page to the site collection when the feature gets activated though. It will only make it available for selection.

If you want to apply your "sample.master" file, when the feature gets activated, add an event receiver to your feature via right-click on the feature and selection "Add Event Receiver".


Open "Feature1.EventReceiver.cs" and comment in "FeatureActivated" and "FeatureDeactivating" methods. Then paste the following code in it:

public override void FeatureActivated(SPFeatureReceiverProperties properties)
{
            try
            {
                using (SPSite site = (SPSite)properties.Feature.Parent)
                {
                    using (SPWeb web = site.RootWeb)
                    {
                        // Create full master url
                        Uri masterUri = new Uri(web.Url + "/_catalogs/masterpage/sample.master");

                        // Master page used by all forms and pages on the site that are NOT publishing pages
                        web.MasterUrl = masterUri.AbsolutePath;

                        // Master page used by all publishing pages on the site
                        web.CustomMasterUrl = masterUri.AbsolutePath;
                        web.Update();
                    }
                }
            }
            catch (Exception exp)
            {
                throw exp;
            }
}

public override void FeatureDeactivating(SPFeatureReceiverProperties properties)
{
            try
            {
                using (SPSite site = (SPSite)properties.Feature.Parent)
                {
                    using (SPWeb web = site.RootWeb)
                    {
                        // Create full master url
                        Uri masterUri = new Uri(web.Url + "/_catalogs/masterpage/v4.master");

                        // Master page used by all forms and pages on the site that are NOT publishing pages
                        web.MasterUrl = masterUri.AbsolutePath;

                        // Master page used by all publishing pages on the site
                        web.CustomMasterUrl = masterUri.AbsolutePath;
                        web.Update();
                    }
                }
            }
            catch (Exception exp)
            {
                throw exp;
            }
}


If you activate the feature, the code in the feature receiver will be executed and will apply "sample.master" to the site collection. As you can see we change both the MasterUrl and the CustomMasterUrl. The MasterUrl is used on all pages that are not publishing pages. This means it is used on the pages in the sitepages library and on the pages in the _layouts directory like the settings page for instance. The CustomMasterUrl is only used on pages that are stored in the Pages library. This library is created when the SharePoint Server Publishing Infrastructure features is activated on the site collection and the SharePoint Server Publishing feature is activated on the site.

Friday, November 6, 2015

PHP - Debugging PHP in Visual Studio

Hi there,

I've found a very, very nice tool for developing PHP applications / websites in Visual Studio.
You can even debug your code line for line as usual in Visual Studio.
Here is the link to the tool:

https://visualstudiogallery.msdn.microsoft.com/6eb51f05-ef01-4513-ac83-4c5f50c95fb5

SQL Server 2008 - Creating an empty GUID

You can create a empty guid with this SQL code:

select CAST(0x0 AS UNIQUEIDENTIFIER) as [emptyGuid]